Drogenberg
BE09 4241 1807 2157
JOOST VERHEYDEN
HOEGAARDEN
KBC Bank
Astrophotography
(c) Joost Verheyden
Hoegaarden, Belgium
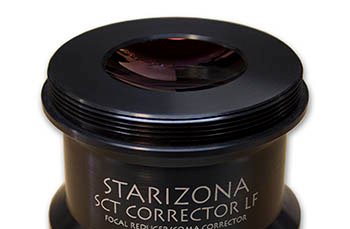
EQUIPMENT REVIEW STARIZONA LF SCT Corrector
All reviews represent my personal opinion after extended usage of the material - I have no connections to any vendor or brand.
Coming soon!
Package is underway. I will test this later in February/March with a Nikon DX format and a C11 Starbright without mirror fix to start with. The LF version is not required for DX but I want to be prepared for larger sensors.
Update: package arrived today!
Picture credit: Starizona

So now the time has come to unbox this corrector. At first sight an impressive chunk of glass! The weight is around 750gr so I am really interested to see how the C11 balancing will go. Typically an SCT is already heavy on the mirror side and I know now the scope is already at the very end of it's Losmandy clamp on the mount. Adding substantially more weight at the mirror side will make this only worse.
Packaging was good allthough I was not very impressed with the rubber caps that protected both ends of the corrector. These caps are made from flexibel rubber and were simply slided over the end. They could easily slide off. Also because of the flexibility, by applying pressure on the caps you could press the rubber against the lens surface. So my preference would be to have 3" hard plastic or metal screw-on caps.
The next challenge now (in my case) was to actually remove the 3,29" adapter on the C11. Since I own a pretty old C11, I have never myself loosened this adapter, and I guess also none of previous owners did so because with no means I could unscrew this adapter from the OTA manually.... finally got it of by using tools and some adapter protection to avoid damage.
Now it came off ! but ...
the C11 (and C14) 3,29" to 2" SCT adapter is screwed on a 3.29" locking nut that locks the internal baffle in place. The internal baffle itself has a diameter of about 60mm. What I did was to un-thread the locking nut with the adapter. So both were stuck in each other :


There was no way both elements were to be seperated! At first I admit, I did not even see that I had actually unthreaded the baffle nut inside the adapter. It required some help from Cloudynight friends to actually understand what happened.
So I put everything in the freezer for about 4 hours at -18°C. Then I submerged the adapter side to hot water for 20 seconds, after which both parts unlocked with the help of tools. To be safe in the futur, I drilled 2mm holes in the nut on both sides, to be used as spanner wrench holes. That way it would be more easy to seperate both parts. As there are no holes the nut only has a small edge of about 3 mm that you can use to get grip for unthreading with a tool. That is not easy and the aluminum parts get easily dented. I refitted the nut to the OTA with the help of the spanner wrench holes, and applied a bit of Loctite Blue (243) to the thread between the baffle and the nut. That way it's still possible to remove the nut. Loctite RED would have joined both parts together but it would require cutting the metal for removal and damaging all parts in the process.
So here it now is on the OTA (which is dusted over after months of storage inside because of the notorious bad winter weather):
.jpg?etag=%2222193-56b5d8b4%22&sourceContentType=image%2Fjpeg&ignoreAspectRatio&resize=490%2B653&extract=0%2B0%2B489%2B652&quality=85)

Next step is to actually decide how to connect the DSLR to this adapter while maintaining the advantage of the LF-version: clear aperture and minimized vignetting. To calculate but also visually picture what is happening I made a sketch of the light beams at F/7 (actually should be F/7.2 for the C11 but I consider that for this sketch the inaccuracy margin of my drawing skills). I placed a Full Framle and a Nikon DX sensor to the left and from there you can see where the F/7 beam cuts thorugh the 48mm (or about 2") tunnel (red lines), or how far it needs a larger tunnel.
The required distance from the corrector to the sensor is 132mm.
You need to consider the part between the Nikon 46,5mm flange distance and the LF Corrector end flange (which is then 132mm - 46,5 mm = 85,5mm)
For full frame it's easy to see that the beam clear the Nikon flange, but soon after that even 2" elements will cut into the beam and will vignet the picture. In this case a larger-aperture tunnel is needed. I am considering 68mm Zeiss elements for this, only converting to 2" or T2 sizes just in front of the DSLR.
For Nikon DX you can see that the beam starts to cut a 2" tunnel only at the Corrector.


Update February, 6th 2016: waiting for clear skies to test with the Nikon D5100 (DX format)
Update 8FEB2016: there seems to be a clear sky tonight so I prepared the C11. The weight on the mirror side is no issue, as I had to remove the Crayford focusser which is almost equal in weight. The correct distance was achieved using teh 3,29" adapter, the 2" SCT to 2" adapter, a 2" nosepiece for T2, a T2 15mm ring, and the Nikon T2 adapter.
I had the IDAS Hutech LPS D1 filter in the nosepiece, but neede to remove it due to reflections. Further to be investigated I guess I need to bring the filter as close as possible to the sensor.
The sky is clear but there are very strong gusts of wind which almost blow me away. The C11 is shaking on the NEQ6. But Orion is high in the sky .... so I decided to have a go at it anyway. I took a lot of short exposures on 3200 ISO (10 seconds each) without any guiding, without any darks. The seeing was very bad as stars were twinkling like crazy. transparancy was quit good.
This is the resulting image of 7'20" integration time (stack of 38x10"+3x20"). There is a slight crop on the left side for removing the stack band. Click on the image to enlarge.
Colllimation of the C11 was ok but I only did a quick check, could probably have been slightly better.

Below is one single un-processed frame straight from the Nikon D5100 APS, only conversion to JPG took place using ViewNX (Nikon) First frame 10 seconds ; second frame 20 seconds.


How is vignetting? With the setup as displayed above, I took flats with the APS size sensor of the Nikon D5100. This is one single frame not processed just converted to JPG with NX View. There are some spots in the flat which are dusts on the sensor. The result is pretty good as I don't see an obvious vignetting. Looking at the M42 image above (processed without flats or darks) that is indeed representative.:

Picture below: one single frame of two minutes of M82. Unprocessed just converted to JPG ISO800 no LPS. No mirror lock yet on the C11.

During some more tests it became clear that the focal plane should be very square to the optical axis. Using the setup as displayed above, with on single bolt that locks the camera in the 2" barrel, will give issues: the sensor will not be square and one corner will be out of focus. I will need to move to threaded connections, if possible with a focussing ring. For a Full Frame sensor this will be even more critical.
Picture below: one single frame of the Eskimo nebula, slightly out of focus but also with the left side of the picture unsharp compared to the right side. 30" no mirror lock.

(c) Copyright 2014 Some Rights Reserved: Attribution-NonCommercial-NoDerivs. To use any of these pictures commercially contact: pictures(at)drogenberg.be or use the contact form.